
How to Integrate Blazor WebAssembly Components in Your WPF Application
In the dynamic landscape of modern application development, the seamless integration of diverse technologies is key to creating robust and feature-rich solutions. In this tutorial, we will explore the integration of Blazor WebAssembly components into a WPF (Windows Presentation Foundation) application, combining the power of Blazor with the versatility of WPF.
This tutorial is centered around the integration of two individual projects that need to coexist. If the scenario involved starting with a clean slate and creating a new project, opting for a Blazor Hybrid solution might indeed be the preferred choice. This approach empowers you to leverage the capabilities of Blazor WebAssembly in your web projects without the obligation to adopt a hybrid model. This is particularly advantageous if you aim to keep your WPF and Blazor WebAssembly applications separate, driven by considerations such as distinct teams and codebases.
Understanding the Basics
Before diving into the integration process, let’s briefly revisit the fundamental concepts. A WPF application, leveraging the Windows Presentation Foundation framework, provides a powerful platform for building Windows desktop applications with rich user interfaces. Many enterprise-level software applications on the Windows platform were created using WPF (Windows Presentation Foundation). This choice is attributed to several advantages that make WPF a preferred framework for developing robust and feature-rich applications in corporate environments.
On the other hand, a Blazor application utilizes WebAssembly to enable the execution of .NET code directly in the browser. If you need a refresher on these concepts, feel free to check out my previous article explaining the ins and outs of Blazor applications.
It’s really easy to add a tested and working Blazor component into your existing WPF app. By reusing code, you can effortlessly upgrade your older WPF app with the cool features of Blazor, bringing the best of both worlds together for a modern user experience.
Add a WPF Project to the SharedBlazorApp Solution
After creating our Blazor application (if you’re unsure how, check out my article link), let’s move on to adding the new WPF project to our SharedBlazorApp solution.
dotnet new wpf -n WpfApp
Now, we need to perform the following actions to enable our WPF project to utilize Blazor components:
Install the Microsoft.AspNetCore.Components.WebView.Wpf NuGet package.
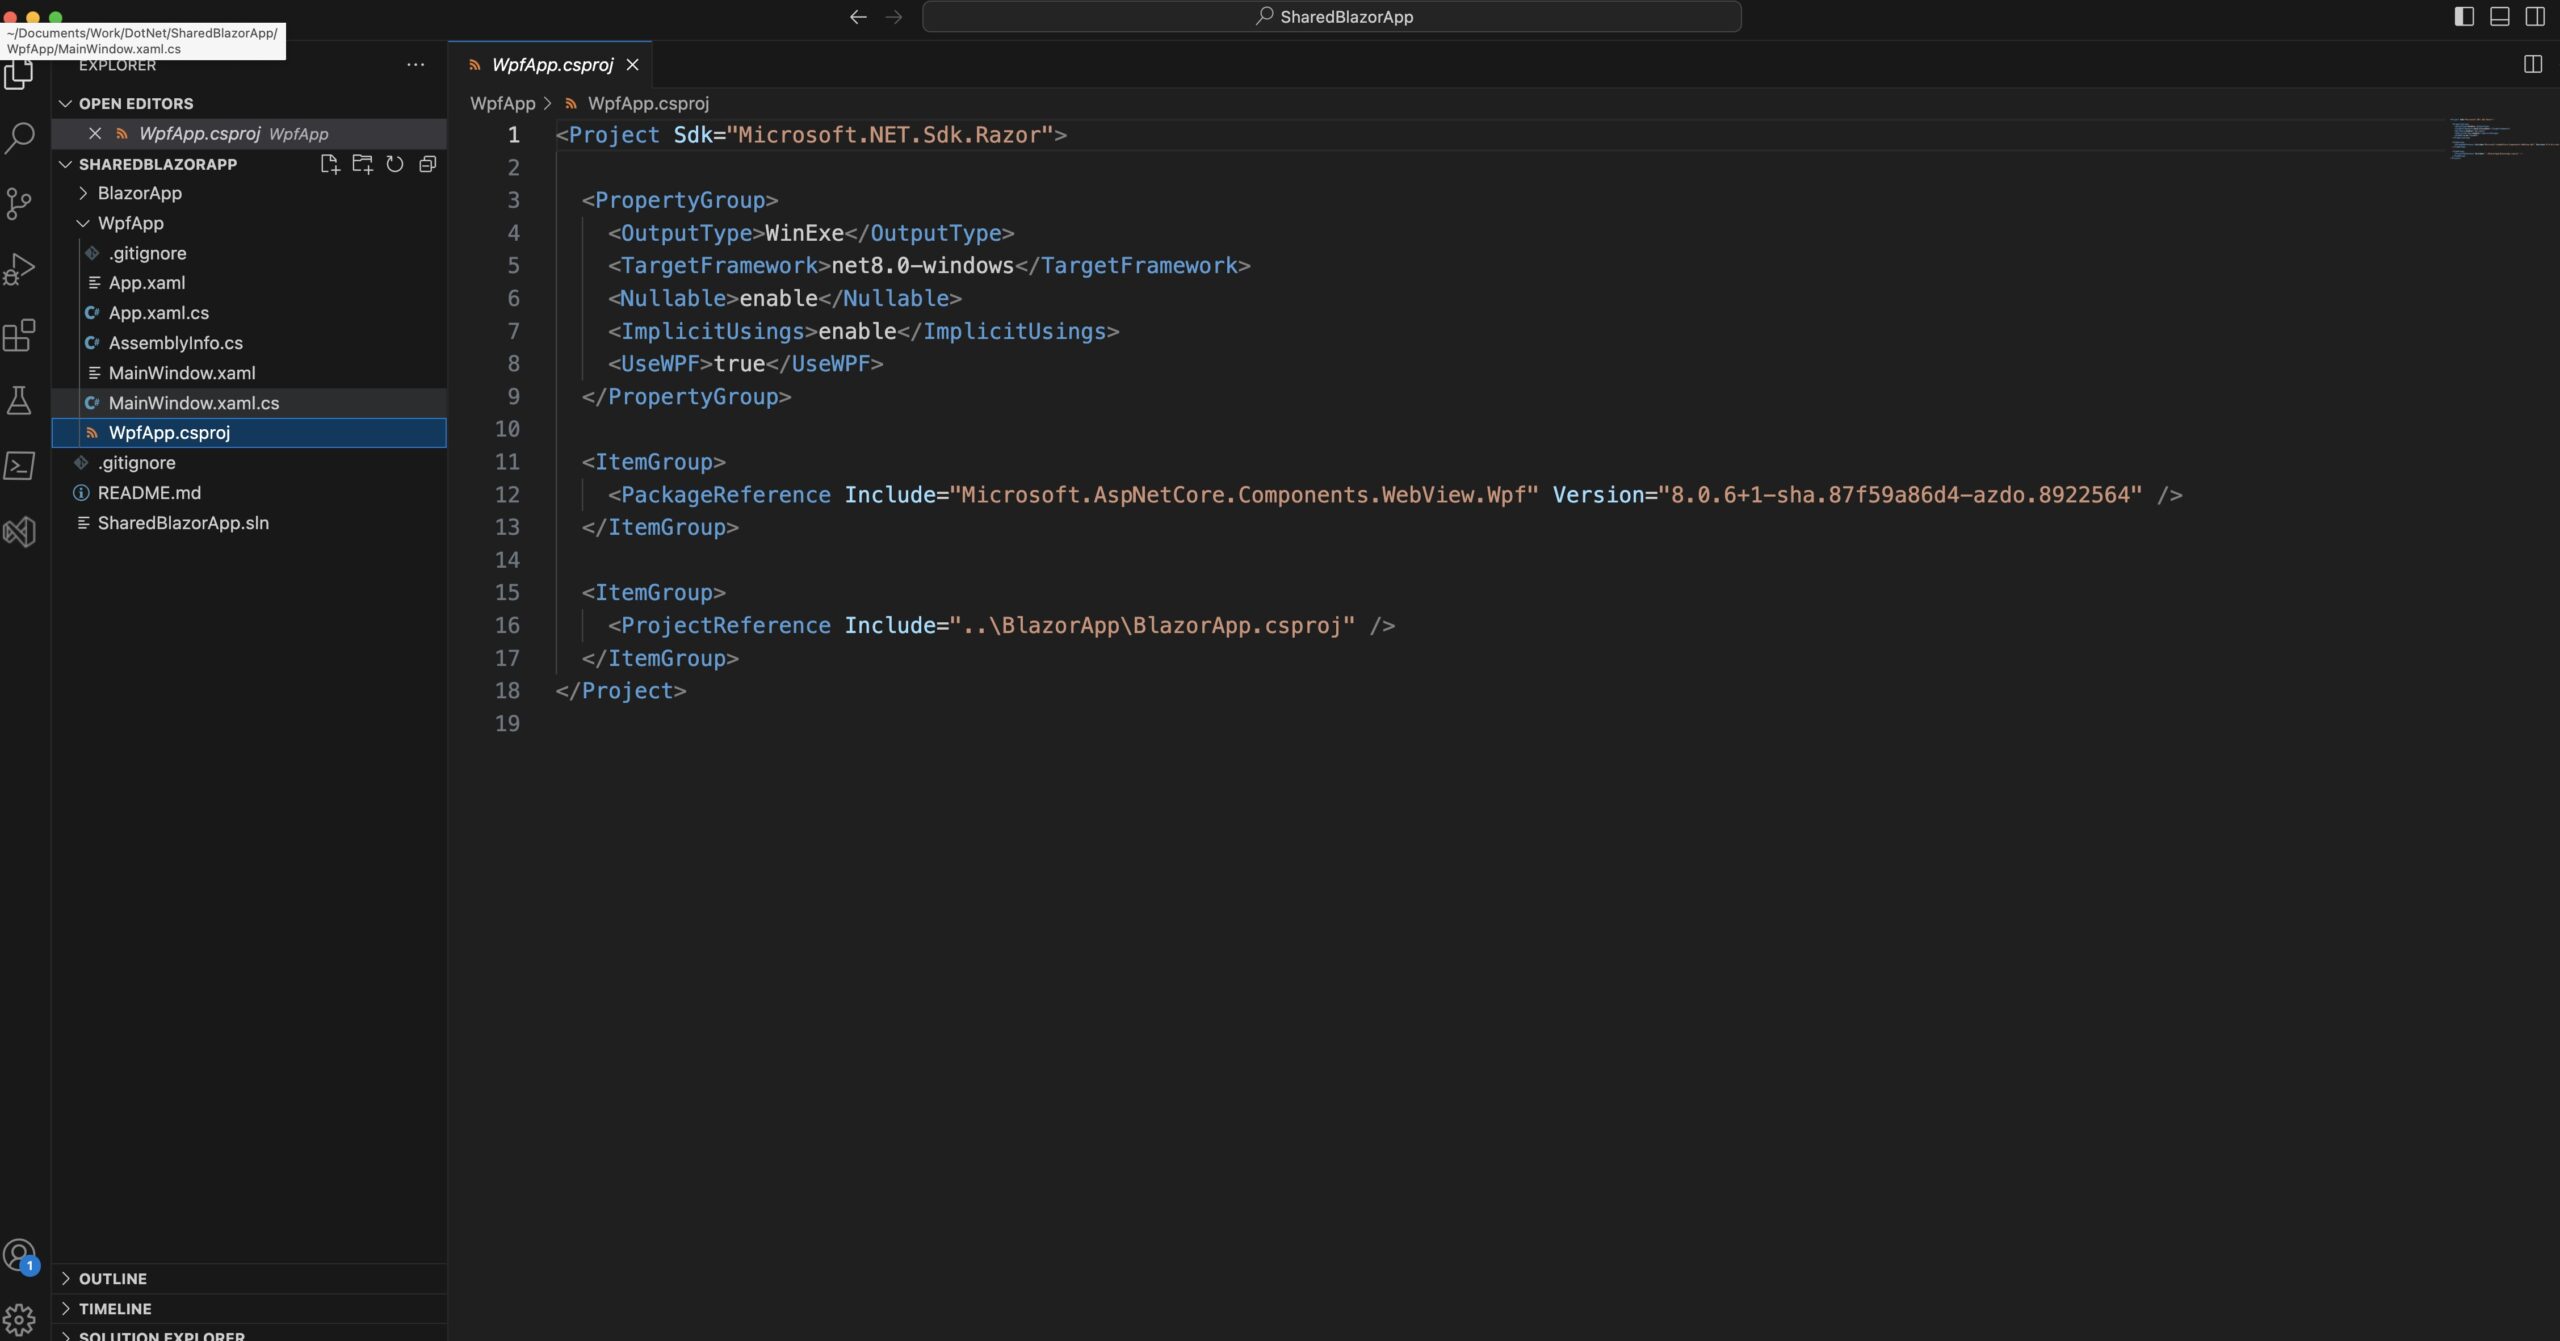
Select ‘Edit Project File’ to open the project file (WpfBlazor.csproj). At the top of the project file, update the SDK to ‘Microsoft.NET.Sdk.Razor’ by modifying the XML as follows:
<Project Sdk="Microsoft.NET.Sdk.Razor">
Additionally, you need to add a reference to the ‘BlazorApp.csproj’ project.
dotnet add reference ..\BlazorApp\BlazorApp.csproj
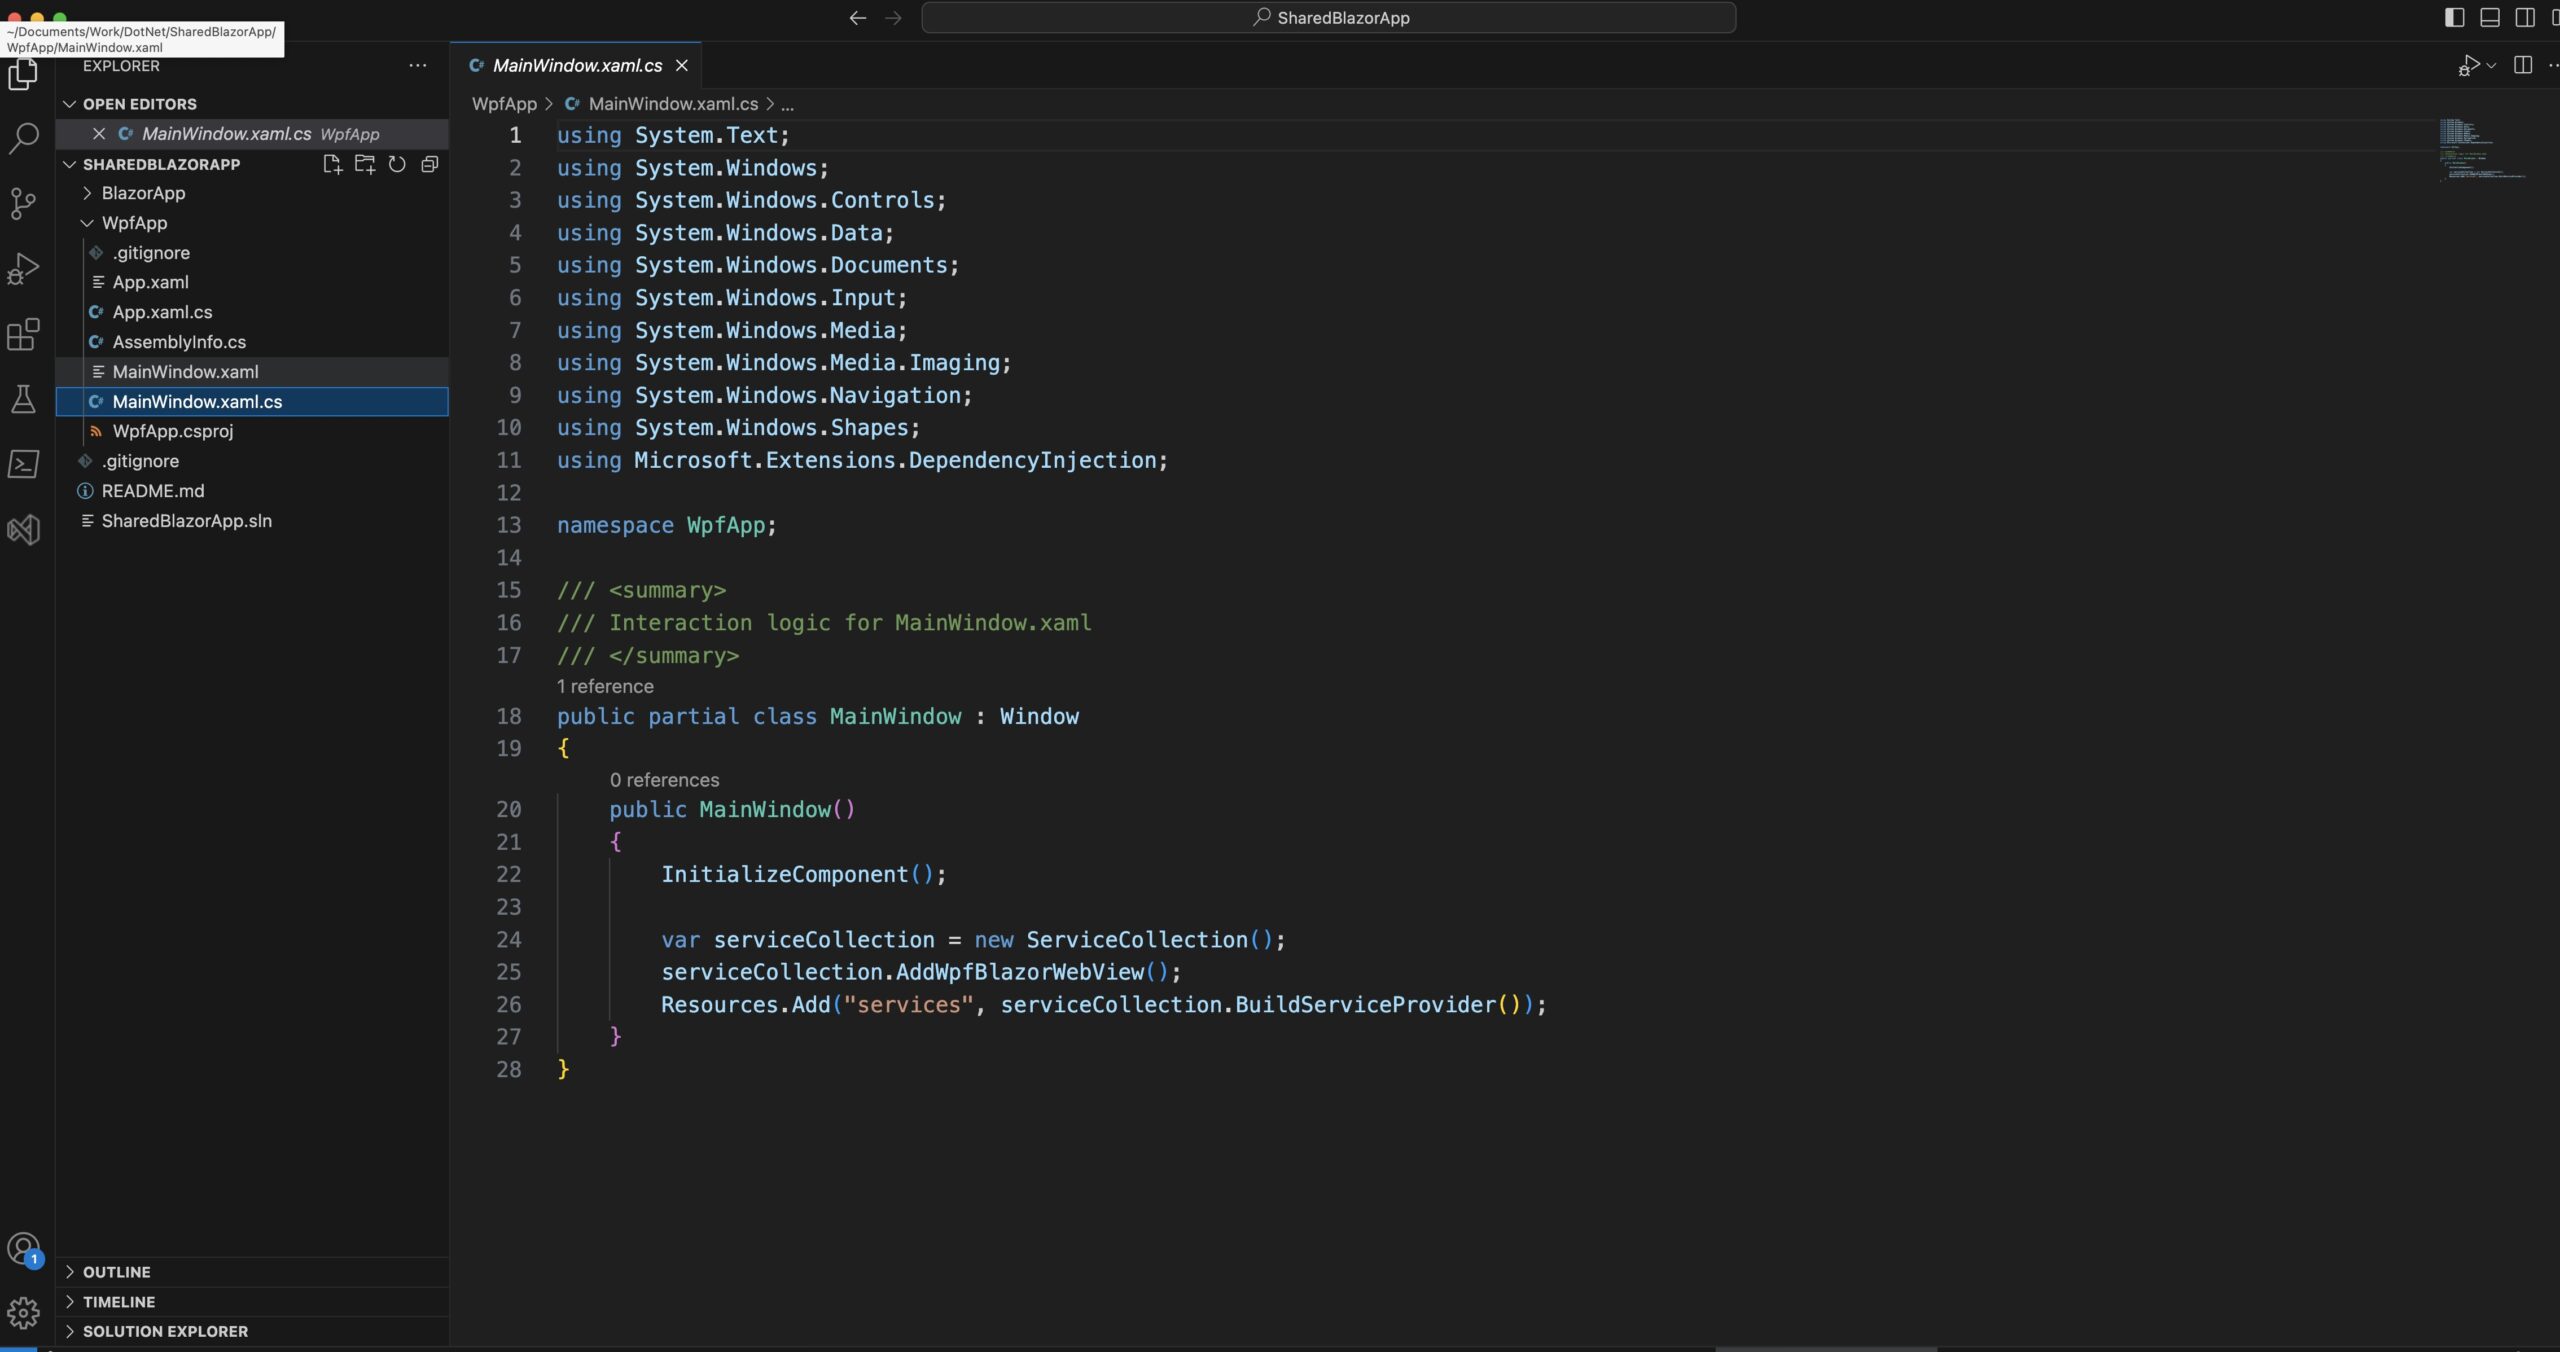
Include the ‘Microsoft.Extensions.DependencyInjection’ namespace at the top of the ‘MainWindow.xaml.cs’ file:
using Microsoft.Extensions.DependencyInjection;
Within the ‘MainWindow’ constructor, after calling the ‘InitializeComponent’ method, add the following code:
var serviceCollection = new ServiceCollection();
serviceCollection.AddWpfBlazorWebView();
Resources.Add("services", serviceCollection.BuildServiceProvider());
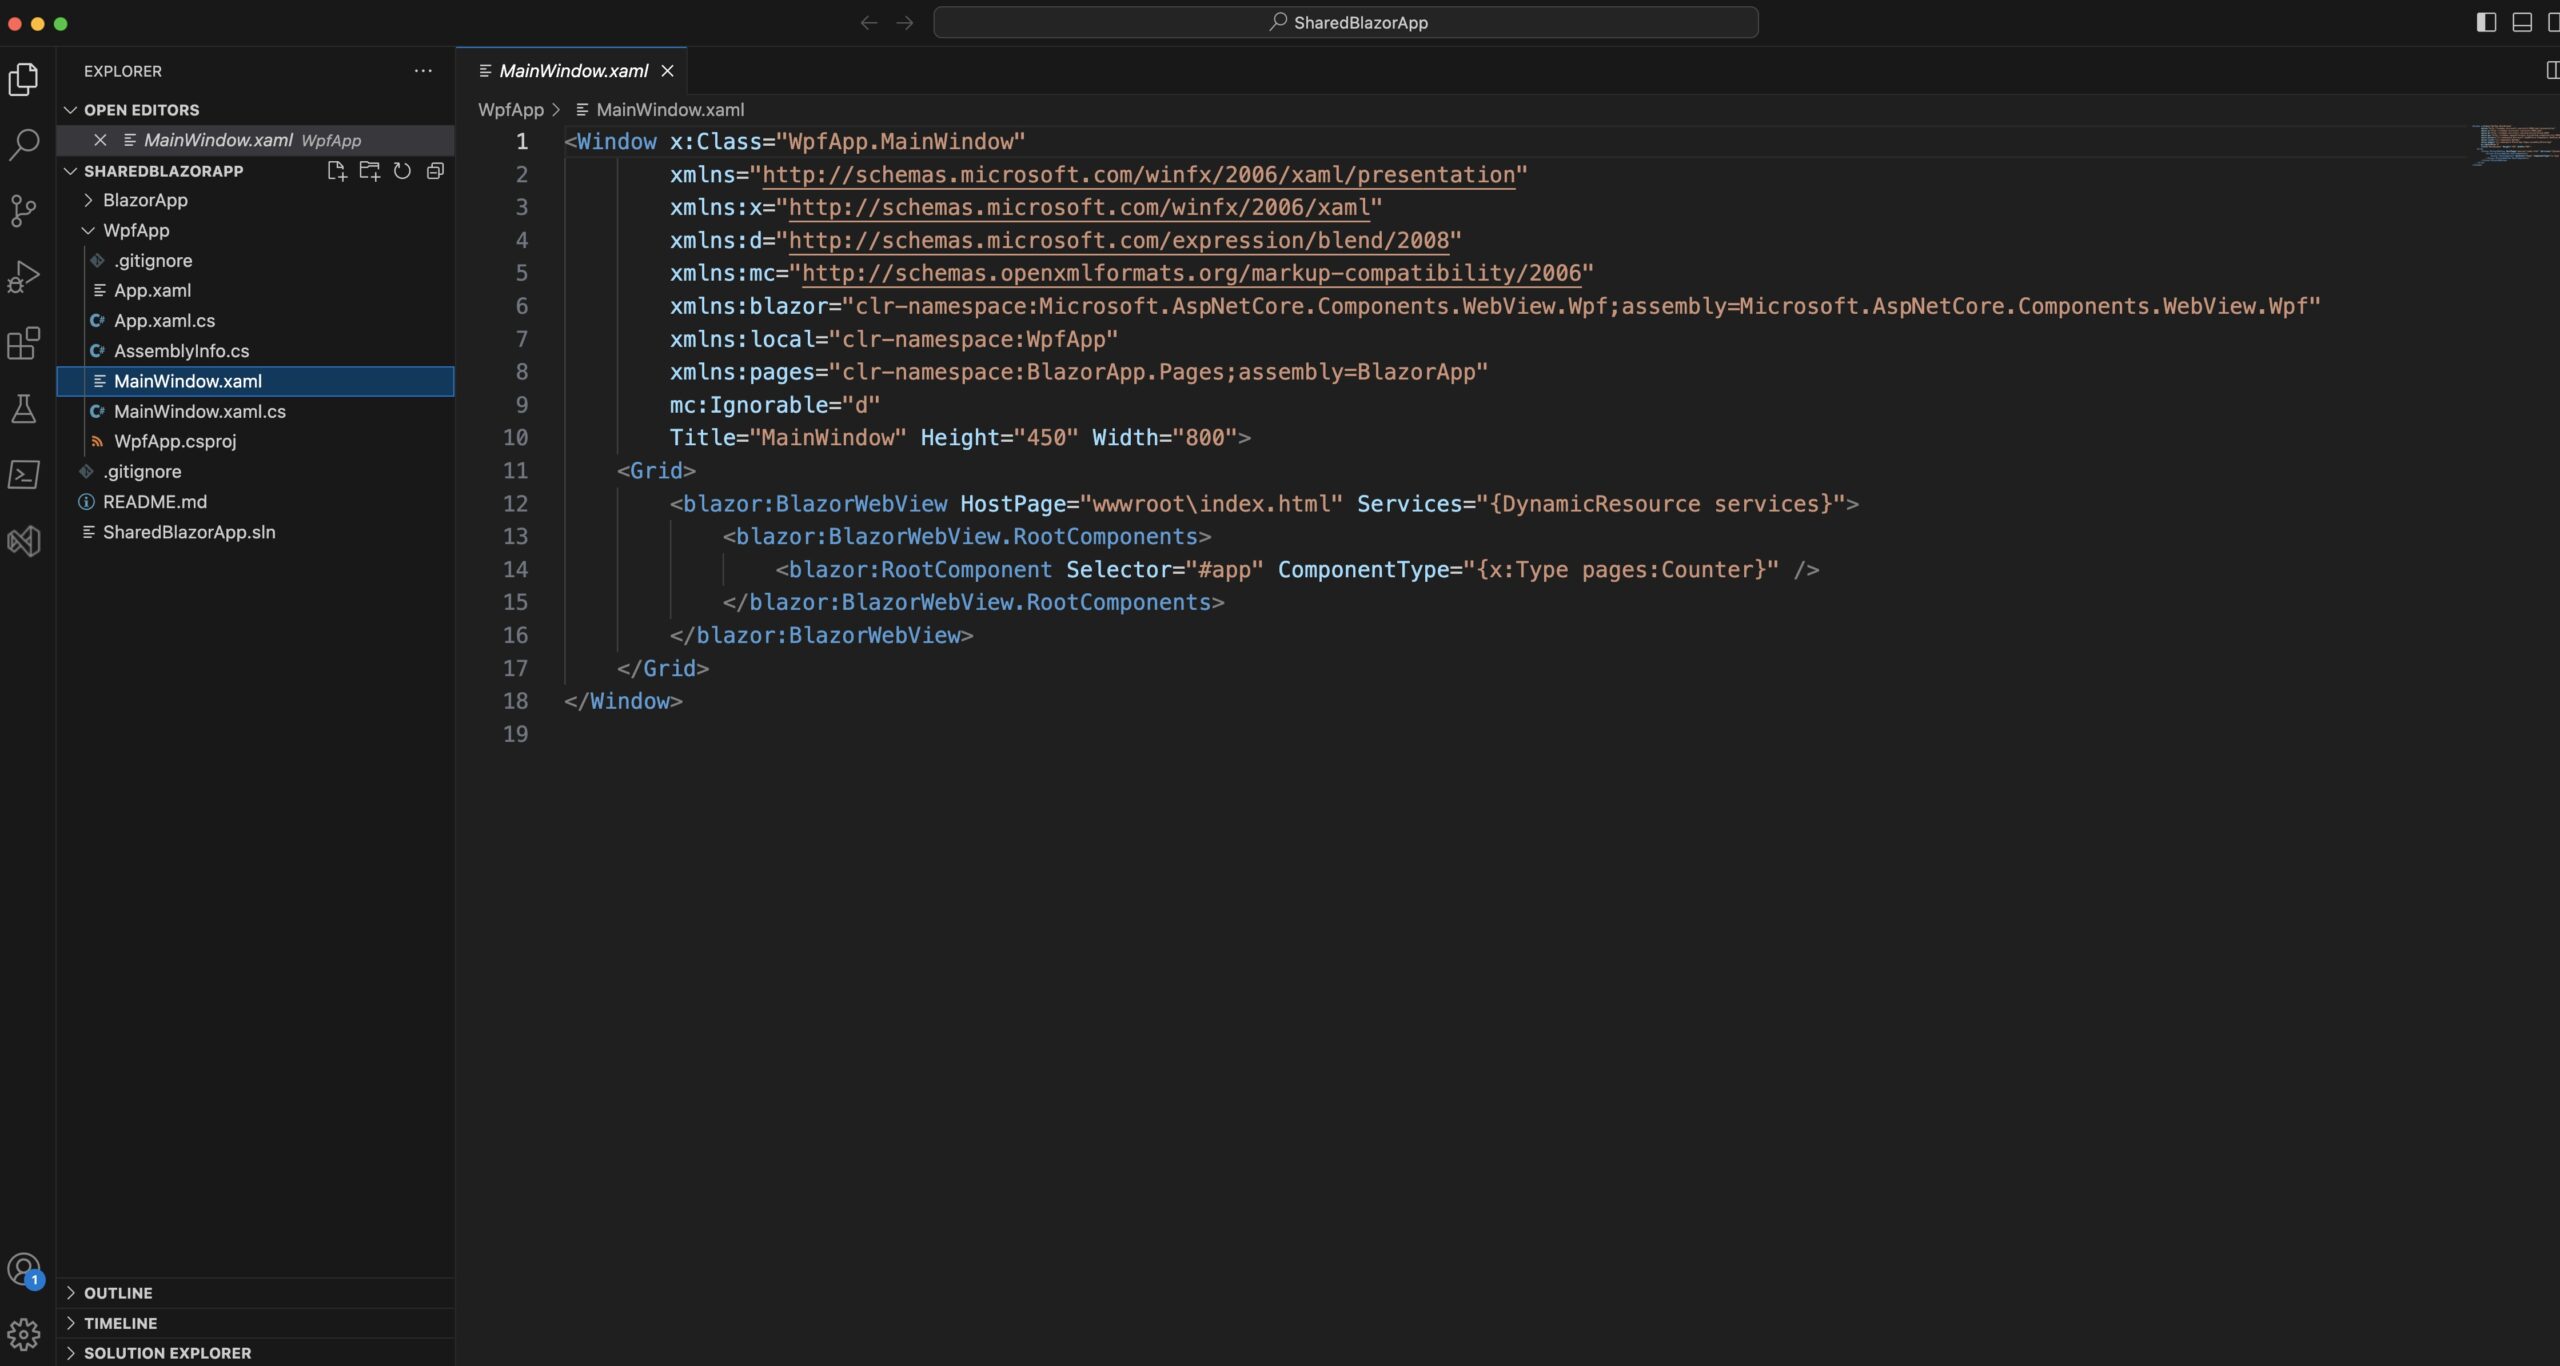
In the MainWindow.xaml, replace the existing XAML code with the following:
<Window x:Class="WpfApp.MainWindow"
  xmlns="http://schemas.microsoft.com/winfx/2006/xaml/presentation"
  xmlns:x="http://schemas.microsoft.com/winfx/2006/xaml"
  xmlns:d="http://schemas.microsoft.com/expression/blend/2008"
  xmlns:mc="http://schemas.openxmlformats.org/markup-compatibility/2006"
  xmlns:blazor="clr-namespace:Microsoft.AspNetCore.Components.WebView.Wpf;assembly=Microsoft.AspNetCore.Components.WebView.Wpf"
  xmlns:local="clr-namespace:WpfApp"
  xmlns:pages="clr-namespace:BlazorApp.Pages;assembly=BlazorApp"
  mc:Ignorable="d"
  Title="MainWindow" Height="450" Width="800">
  <Grid>
    <blazor:BlazorWebView HostPage="wwwroot\index.html" Services="{DynamicResource services}">
      <blazor:BlazorWebView.RootComponents>
        <blazor:RootComponent Selector="#app" ComponentType="{x:Type pages:Counter}" />
      </blazor:BlazorWebView.RootComponents>
    </blazor:BlazorWebView>
  </Grid>
</Window>
This XAML code configures the MainWindow to host a BlazorWebView, specifying the host page and the root component for rendering.
Conclusion: Integrating Blazor in Your WPF Application
Congratulations! You can now seamlessly run the Blazor component within your WPF application. Through this concise tutorial, the aim was to showcase how effortlessly you can breathe new life into, or reuse, a fresh Blazor component within your existing WPF app. Naturally, this process is also applicable to MAUI apps, a topic we’ll explore in an upcoming article. If you’re interested in exploring the source code of this project, you can find it on GitHub.
If you think your friends/network would find this useful, please share it with them. I’d really appreciate it.
Thanks for reading! 
🚀 Discover CodeSwissKnife, your all-in-one, offline toolkit for developers!
Click to explore CodeSwissKnife 👉